Introduction
As ophthalmologists, we often encounter patients with diplopia, especially vertical diplopia. Among the most valuable clinical tools to localize the paretic muscle in a vertical strabismus is Park’s 3-Step Test. This time-tested method simplifies the diagnostic process and provides a structured approach that is essential for exams like FRCOphth OSCEs and clinical practice alike.
Let’s walk through the Park’s 3-Step Test with clinical insights, pitfalls to avoid, and tips to remember.
What is Park’s 3-Step Test?
Park’s 3-Step Test is used to isolate a single paretic cyclovertical extraocular muscle in cases of acquired vertical strabismus. It’s particularly helpful when you suspect a cranial nerve IV (trochlear) palsy, but it can also help with other vertical muscle palsies.
🔍 Step-by-Step Breakdown
Step 1: Which eye is hypertropic in primary position?
- A hypertropia means one eye is higher than the other.
- This tells us that either the depressor of that eye is weak, or the elevator of the opposite eye is weak.
For example:
- If the right eye is hypertropic in primary gaze, the possibilities are:
- Weak right depressors → Right superior oblique or right inferior rectus
- Weak left elevators → Left superior rectus or left inferior oblique
This narrows down the possibilities to 4 muscles.
✅ Step 2: Is the hypertropia worse in left gaze or right gaze?
- This tells you which yoked pair is more active, hence which muscle is struggling.
Tip:
- Muscles are maximally active when moving the eye into their field of action.
Example continued:
- If the right hypertropia worsens in left gaze:
- In left gaze, right superior oblique and left superior rectus are active.
- So among the 4 muscles from Step 1, this step helps eliminate two.
✅ Step 3: Is the hypertropia worse when the head is tilted to the left or right?
- This uses the Bielschowsky head tilt test to assess torsional function.
- On head tilt, the intortors (superior oblique and superior rectus) of the eye on the same side are stimulated to keep the image upright.
Example continued:
- If hypertropia increases on right head tilt:
- Right intortors are being asked to act (right superior oblique and right superior rectus)
- If there is a weak right superior oblique, it will fail to intort, worsening the hypertropia.
🎯 Conclusion of the Test:
- If all 3 steps point to the right superior oblique, that’s your affected muscle.
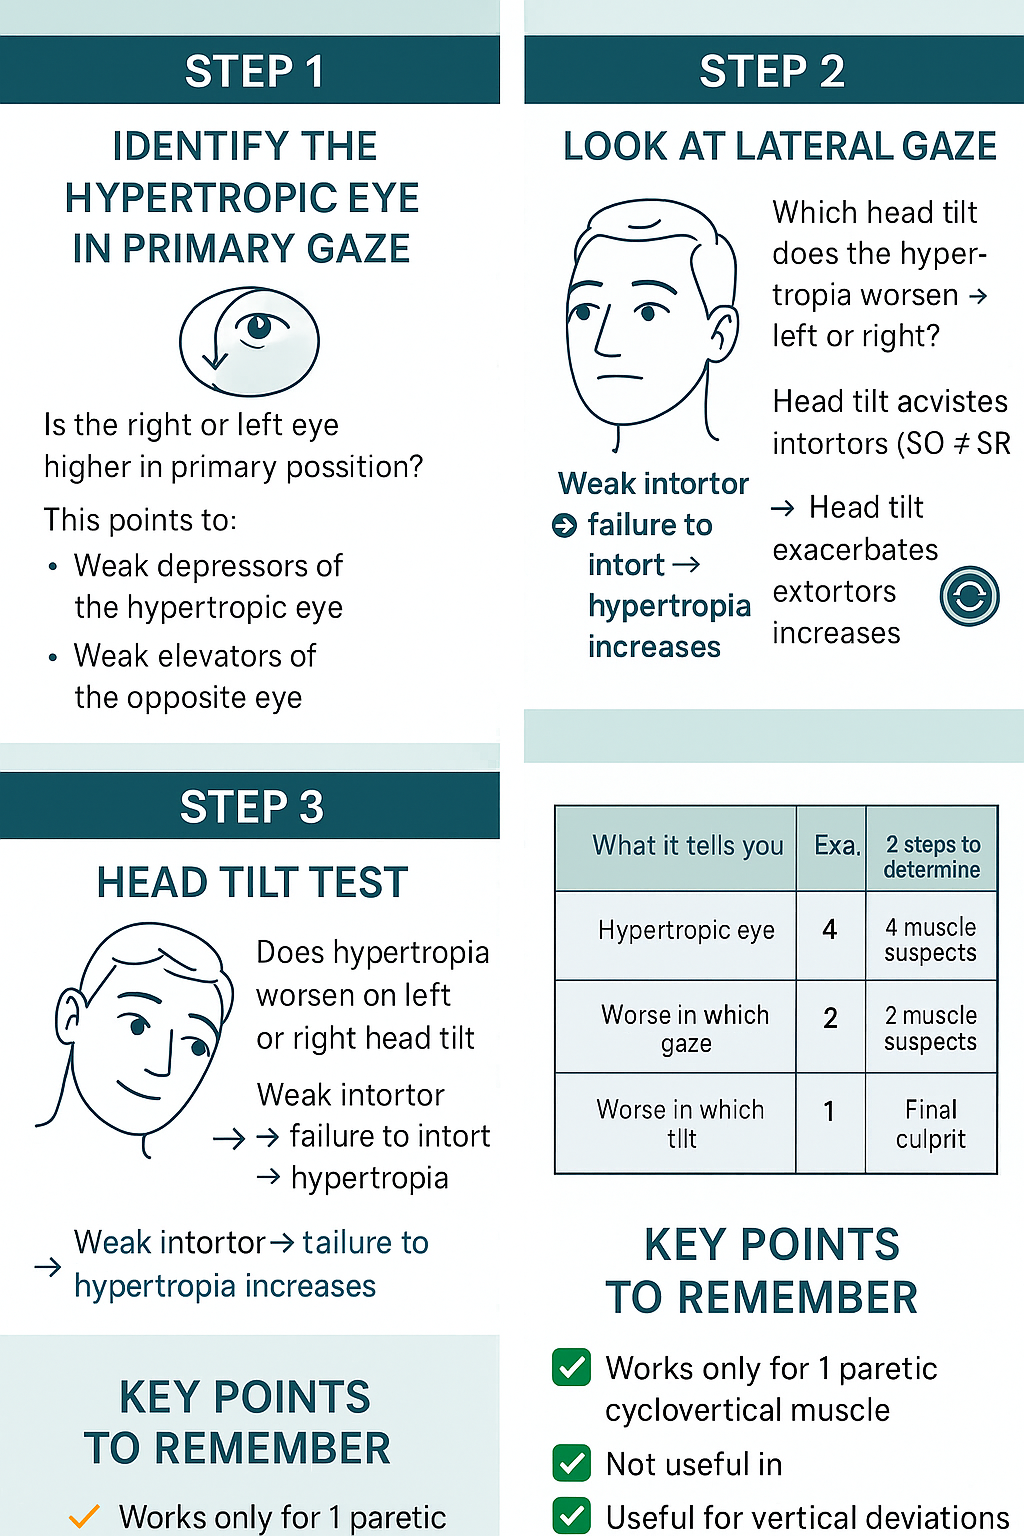
🔄 Summary Table
| Step | Question | Muscles Involved |
|---|---|---|
| 1 | Which eye is hypertropic in primary position? | 4 muscles (2 ipsilateral depressors + 2 contralateral elevators) |
| 2 | Worse in left or right gaze? | Narrows down to 2 muscles |
| 3 | Worse with head tilt to left or right? | Pinpoints the 1 affected muscle |
✨ Key Tips to Remember
- Always assess diplopia in primary gaze, lateral gaze, and with head tilt.
- It only works if one cyclovertical muscle is paretic (not useful in restrictive strabismus or myasthenia gravis).
- Be careful in long-standing cases—secondary contractures may skew results.
- Don’t forget to correlate with subjective torsion and fundus exam.
📚 Bonus for FRCOphth Exam Takers
In OSCEs, if presented with a diplopia chart or cover test in different gazes, use this method to confidently name the muscle involved. If asked viva questions:
- Know the anatomy of the superior oblique (longest, thinnest, most commonly affected).
- Be ready to explain why head tilt helps isolate the affected muscle.
Conclusion
Park’s 3-Step Test is a clever and reliable clinical tool. It not only localizes the affected muscle in vertical strabismus but also reflects the beauty of functional ocular motility assessment. Whether in exam halls or clinics, understanding this stepwise method can save time and confusion.
🧠 Remember: Practice with clinical scenarios and diplopia charts to solidify your concepts.